Libre Office Writer: How to Write Letters With Diacritical Marks
Hi! Today we were conducting the ICT Training at IIC, UDSC which aims at promoting the use of Open-Source Softwares in the University amongst the teachers as well as students. We were giving the Faculty hands-on with Ubuntu and, since, they were new to Ubuntu so many questions were shot on us and one out of them was how to write characters with diacritical marks(e.g ë, õ) in LibreOffice Writer. I found the question interesting as I got a new thing to explore. So I started searching for the solution and within few minutes I found one.
I am demonstrating the procedure below:
First of all go here and download the ComposeSpecialCharacter extension or directly download it from here
Now Open the LibreOffice Writer and go to the tools tab and select Extension manager.
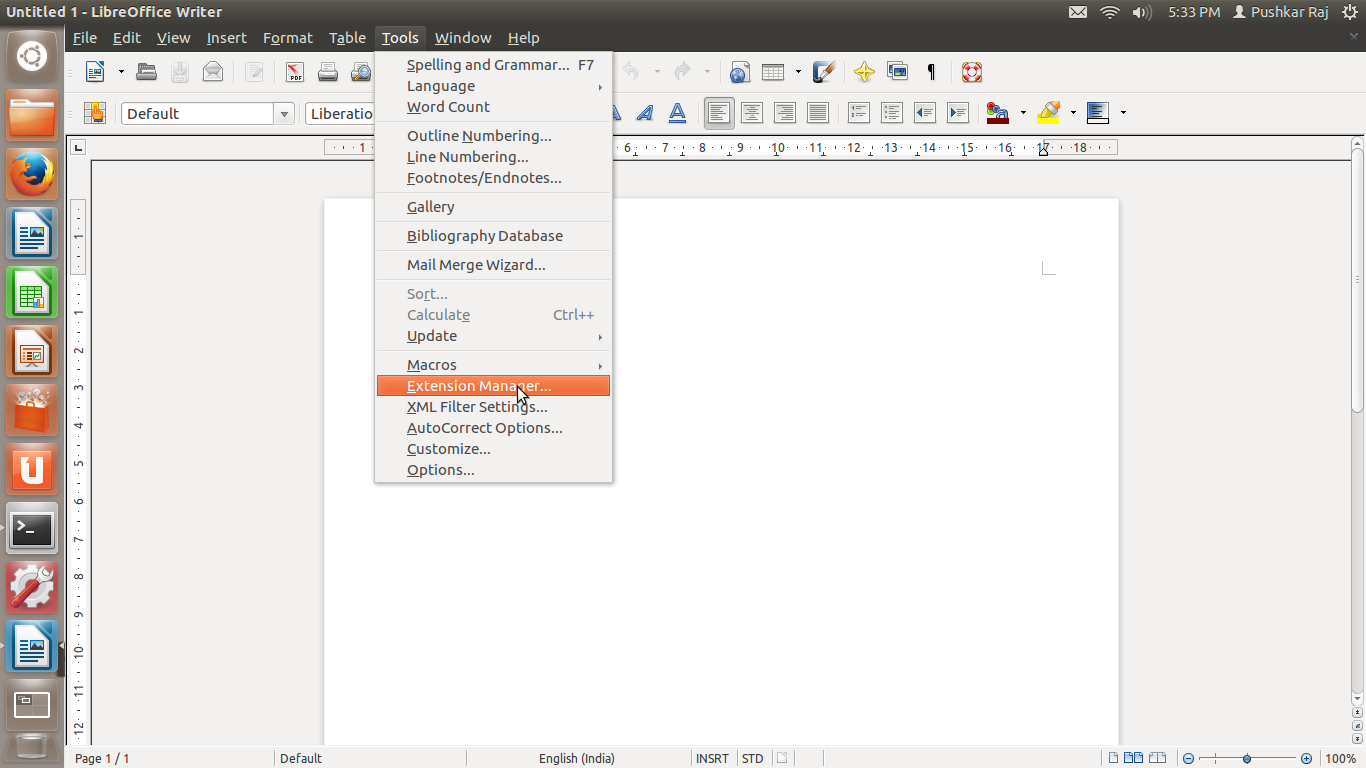
The following window will appear which prompts you to add an extension.
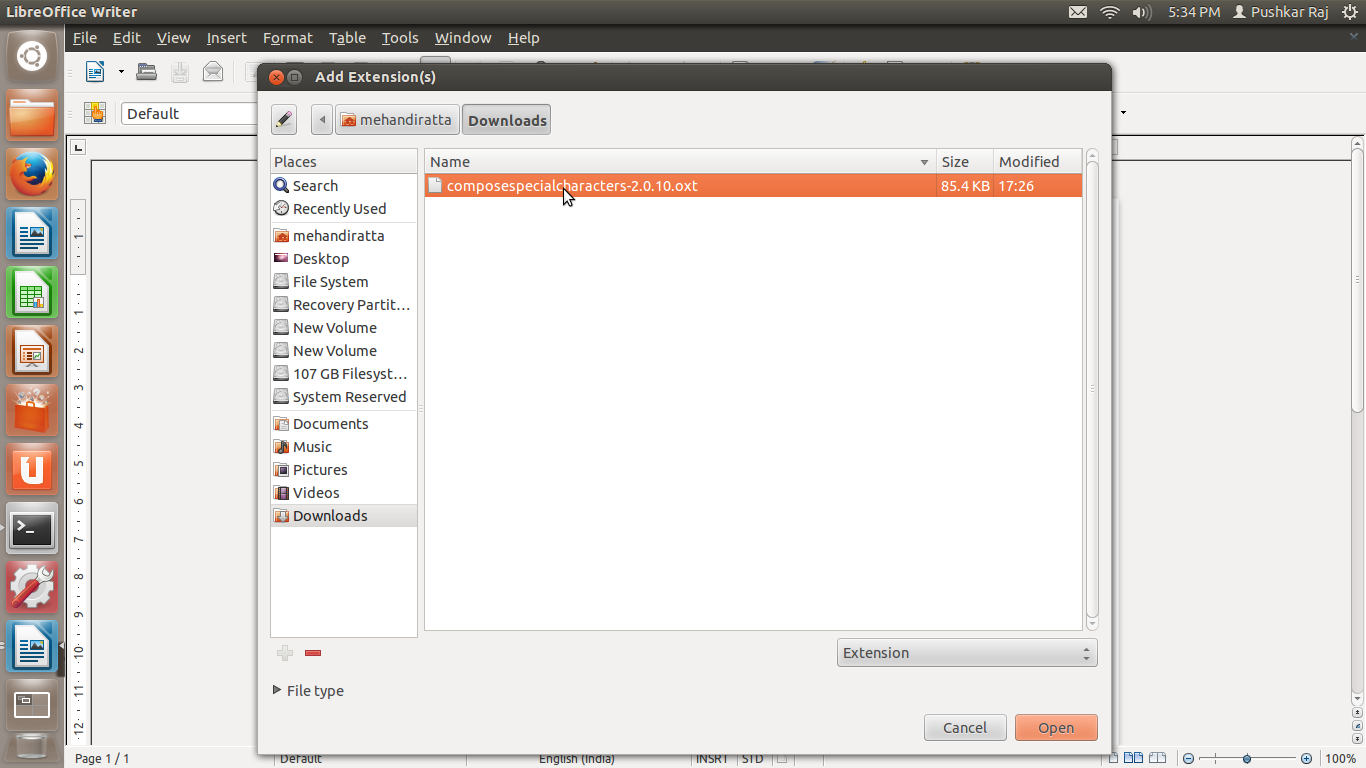
 Click on Add and go to the directory where the file has been downloaded, select the file and click Open as demonstrated below.
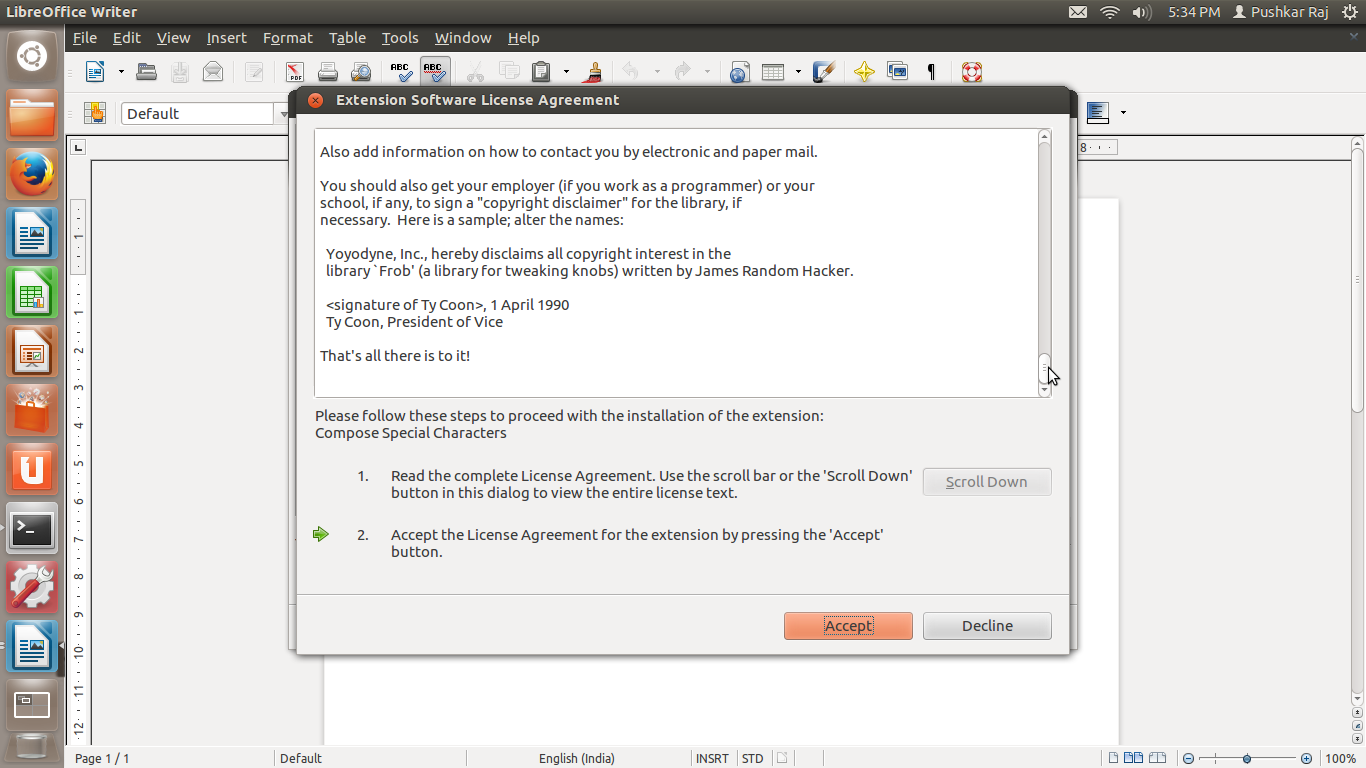
 Now the Extension Software License Agreement Window will appear you will see the Accept button is disabled. Scroll till end and it will become active, click Accept and close the next window that appears.
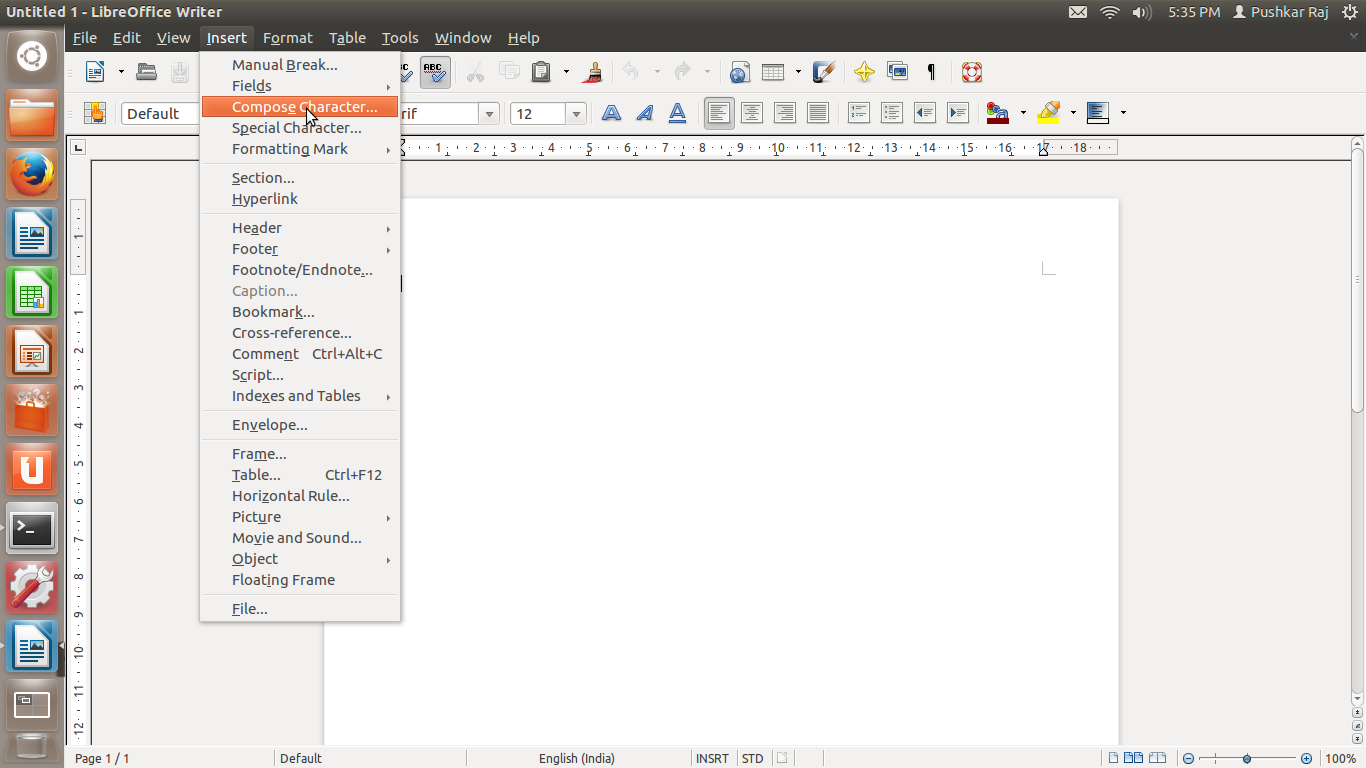
 Now close and relaunch the LibreOffice Writer and you can see that a new option named Compose Character appears under the Insert tab.
 On clicking the compose character option you will see a window(shown below) appearing on your screen that displays the information on how to use the keyboard shortcuts to enter the special characters on the editor. But before using the shortcuts you need to set the CSC(Compose Special Character) Shortcut key-combination.
 Click on the CSC Shortcut tab and you will be greeted with a new window that prompts you to set a key-combination for composing special characetrs.
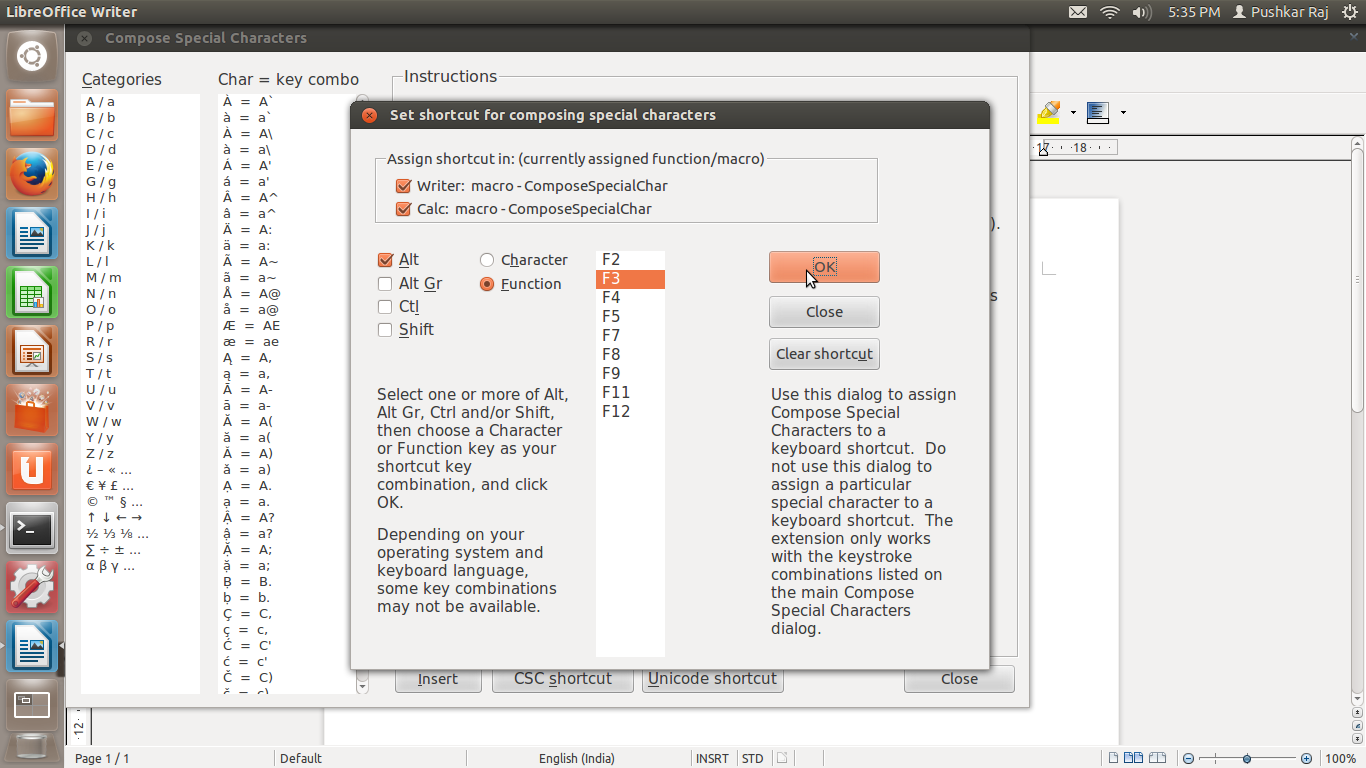 Here, as you can see, I have chosen the alt+F3 key-combination, you can choose any combination like shift+F2, alt+ctrl+m, ctrl+g but make sure the combination you choose should not conflict with any other shortcut already defined for the editor.
Click OK and also on the next two windows that appear click OK
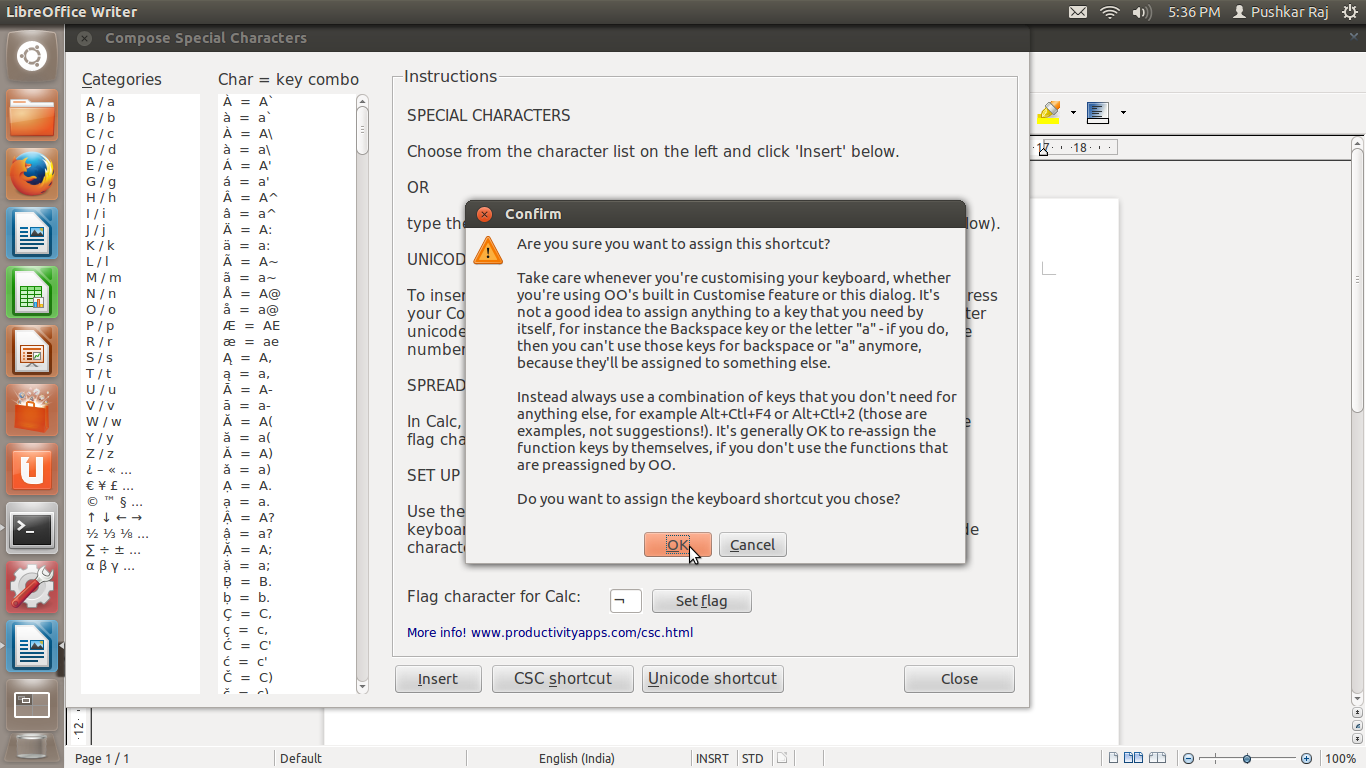
 Now the following window shows you the key-pair to use for writing the words with diacritical marks.
 Suppose you want to write “Ø” then as shown first you have to type “O/” and then you need to press the CSC key-combination set by you, which in my case is alt+F3
Simillarly to type any other character just look for its key-pair value and then afte typing in the key-pair value press your CSC key and you are done.
As simple as that!